This blogpost aims to provide a comprehensive guide on how to use Chechra1n to jailbreak an IOS device using a Windows PC.
If you are into the latest news about the iPhone world, you probably have already heard about Checkra1n Jailbreak – a popular tool to jailbreak iOS devices. This tool has gained a significant traction lately which compelled us to scour the internet and present the detailed instructions on using checkra1n windows to jailbreak an iPhone.
What is Checkra1n Jailbreak?
Checkra1n is a legitimate, iOS jailbreaking tool that has been conceptualized by a well-known hacker iOS hacker Luca Todesco and his team who managed to exploit the vulnerabilities in iOS. Over the past few months, many users claim to have jailbroken their iPhone using this software.
Basically, Chectra1n is a semi-tethered jailbreak which an ability to your iOS device to reboot on its own. What makes Checkra1n so special is that it exploits a flaw in the Boot ROM, which is the first code that runs when an iDevice is turned on. That’s why Checkra1n jailbreak will work permanently on iOS devices.
Requirements before Using Checkra1n
Before proceeding to jailbreak your iPhone using Checkra1n, make sure to meet all the requirements or preconditions of using this application – since it supports only a limited number of iPhone models.
Supported Devices
- Checkra1n doesn’t support Apple Silicon Macs.
- Your iPhone must be running iOS 12.0 or later.
- It doesn’t support iPhone 5S, iPad mini 2, iPad mini 3, and iPad Air.
- Chectra1n is compatible with 64-bit A5-A11 devices from the iPhone 5s to the iPhone X, with few exceptions – which include iPad Air 2, iPad (5th generation), and iPad Pro (1st generation).
Guideline for iOS 14
If you’re running iOS 14 on your iPhone, then Cehctra1n supports the following devices:
- It officially supports only A10/A10X devices which include:
- iPhone 6s, 6s Plus, SE, 7 and 7 Plus.
- iPad 5th, 6th, and 7th generations
- iPad mini 2, iPad Air 2, iPod touch 7, and iPad Pro 1st and 2nd generations.
The user feedback shows that Chectra1n works best for Mac computer running on macOS 10.13-10.15. Also, it is recommended not to set screen passcode for all devices after using Checkra1n to jailbreak your iPhone.
These conditions definitely cause a huge inconvenience in terms of user security, but you have to do it until the checkra1n team finds a workaround for this inconvenience.
How to Use Checkra1n to Jailbreak Devices on Windows
Now that you know what is Checkra1n Jailbreak and what specifications your computer and iPhone need to meet, follow the below step-by-step guide to jailbreak your iOS device using Checkra1n.
Unlike traditional iOS jailbreaking software, Checkra1n follows a different and more complicated method on Windows PC to jailbreak your device. Stick to reading to learn how to do use Checkra1n windows:
Step 1: Before starting the jailbreaking process, download ubuntu .iso file, rufus.exe and checkra1n-x86_64 file on your computer from the official Chectra1n website.
Don’t download these files from anywhere else to avoid getting infected by malware.
Step 2: Now, connect your device to Mac with a USB drive of at least 2GB capacity into your computer and launch Rufus file.
Step 3: On the Rufus home interface, hit on Select and choose the Ubuntu image file that you have just downloaded. Soon you select it, “ubuntu-20.04.1-desktop-amd64.iso” will be displayed under the Boot selection tab as shown in the figure.

Keep other settings unchanged and click on Start to begin the process.
Step 4: A confirmation window reading “All data on your USB flash will be destroyed” will pop-up. Choose the Recommended mode and hit on Ok.
Step 5: The software will take a few minutes to create an ISO image file on your flash drive. Wait patiently and don’t disconnect the USB drive during the process. Click on Close when it’s done.

You should disconnect the flash drive and plug it in again.

Step 6: Now, restart your computer and before your computer enters into the OS, press F12 or any other key combination to enter the BIOS.

Step 7: On the main BIOS interface, choose the USB drive (as shown in the figure below) using the arrow keys and hit Enter.

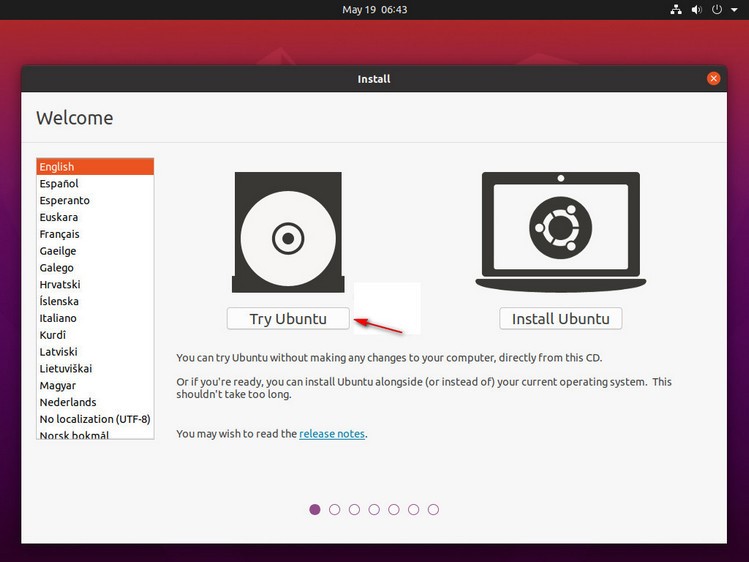
Step 8: The system will start loading the Ubuntu system. When the loading process is completed, click on Ubuntu – the first option on the next interface – to start the booting process.
Step 9: A new interface will show up when the booting process is completed. Here, hit on Try Ubuntu to launch Ubuntu from the USB drive to enter the Ubuntu system.
Make sure your iPhone is connected to the system.
Step 10: Now, search for the “checkra1n-x86_64” file you downloaded at the start. You need to use Terminal to launch Chectra1n on Windows.
Step 11: Launch Terminal and enter the codes: “chmod +x ” (there’s a space before the plus sign and after x) and then drag and paste the drag the “checkra1n-x86_64” file onto the Terminal interface and hit Enter.

Then type in “sudo ” (space after o) and again drag and paste the drag the “checkra1n-x86_64” file onto the Terminal interface and hit Enter as shown in the figure.
Step 12: Now, Chectra1n will start running and the below interface will appear on your screen. Hit on Start to proceed.

If somehow, this Start option is grey then, click on Options and select “Allow untested iOS/iPadOS/tvOS versions” and then go back and hit on Enter.

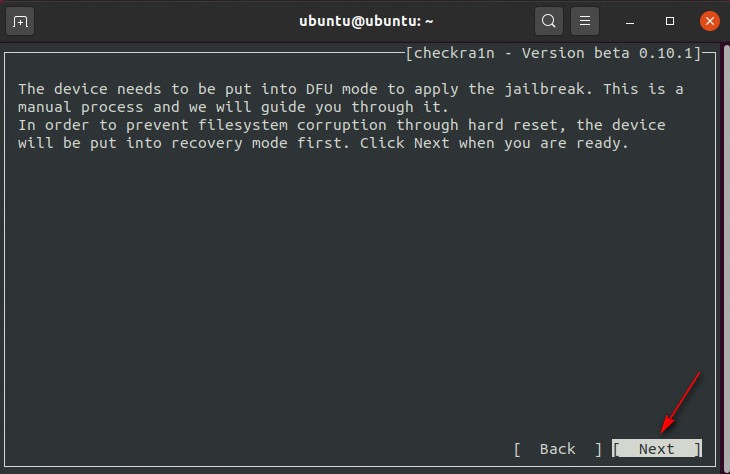
Step 13: Chectra1n will ask you to enter the device into the Recovery Mode. Click on Next to confirm the action.
Step 14: Now, hit on Start and follow the onscreen instructions to enter your device into the DFU mode.

Checkra1n will then automatically start jailbreaking your iOS device. Hit on Done when it’s completed.
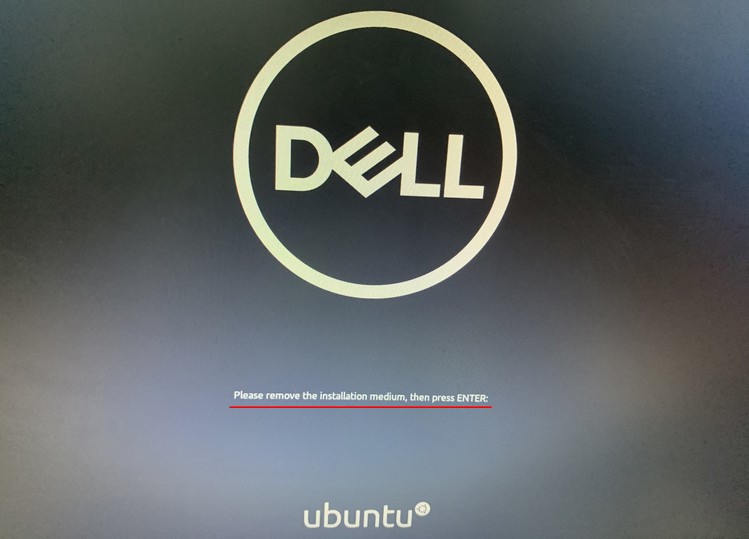
Step 15: Now, exit Ubuntu when the jailbreaking process is done and then restart your computer. Then, disconnect your USB flash drive and hit Enter. Your computer will start and function normally.
And that’s how you jailbreak an iOS device using checkra1n windows.
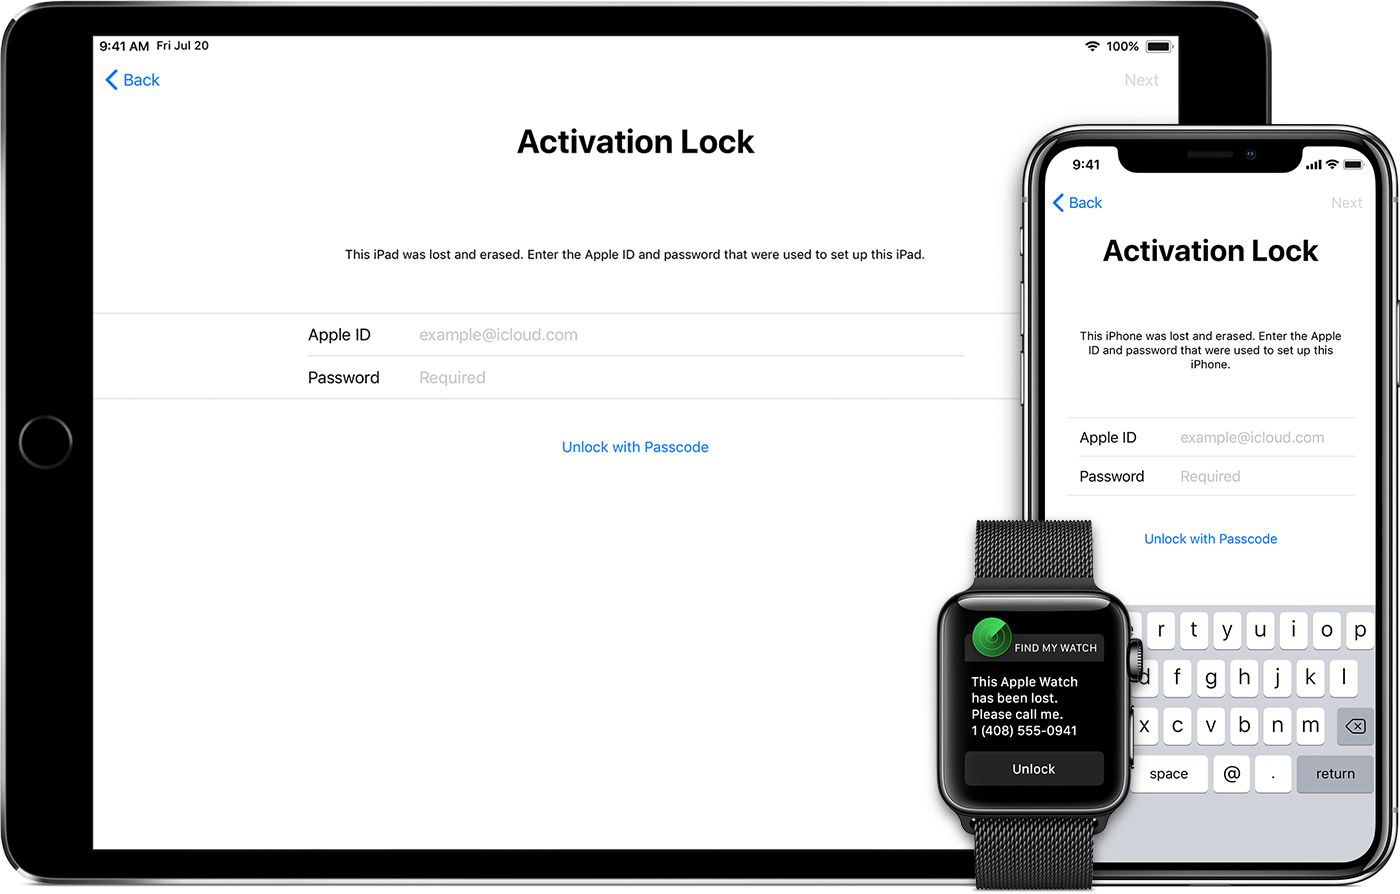
How to Use Professional Tool for Activation Bypass after Jailbreak
Once you have jailbroken your device, you must be wondering how to bypass the activation lock – given jailbreaking alone cannot bypass the activation lock. You need a professional tool like WooTechy iSalvor to remove the activation lock in just a few minutes.
The best thing about iSalvor is that it provides an inbuilt, step-by-step guide to jailbreak your iPhone quickly and safely. Its intuitive and user-friendly interface, stellar features, universal compatibility, and 100% success rate make it stand apart from other players in the market.
Follow the below steps to bypass the activation lock after jailbreaking.
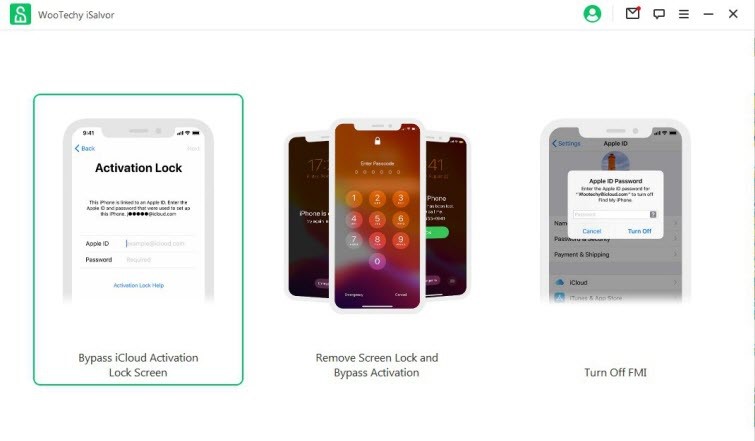
Step 1: After installing iSalvor, launch it on your computer and hit on the “Bypass iCloud Activation Lock Screen” option.
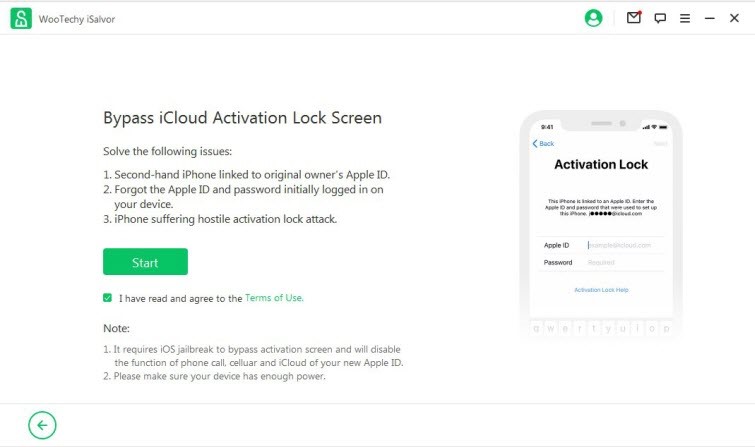
Step 2: You’ll enter a new screen. Click on Start and then connect your locked iPhone to it.

Step 3: Now, since your iPhone is already jailbroken, iSalvor won’t show the below interface and directly the details of your device.

Confirm the information shown on the screen and click on Start Bypass

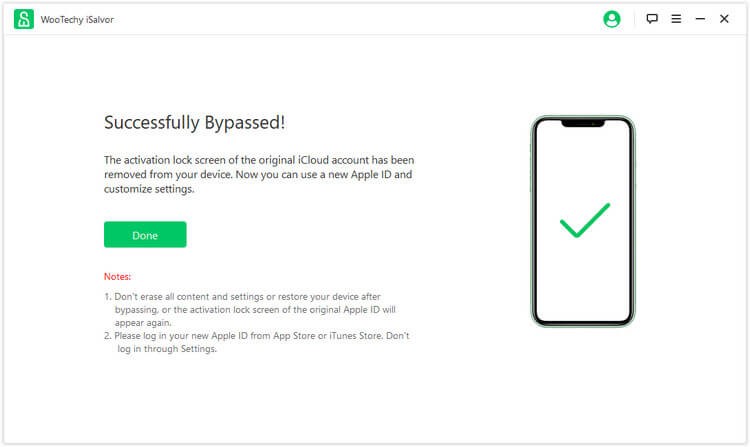
Step 4: Now, iSalvor will take hardly a few minutes to completely bypass the activation lock.

Click on Done when it’s completed and start using your iPhone by entering a new Apple ID through App Store.
Supported Devices
Unlike many other similar software, iSalvor supports both Mac and Windows PC and a whole range of iPhone and iPad. The “remove activation lock” feature is compatible with iPhone 5S – iPhone X and iOS 12 and later.
It also supports iPod Touch 6 and iPod Touch 7 and 5th, 6th, and 7th Generation iPads along with many iPad mini and iPad Pro models.
Conclusion
To wrap it up, jailbreaking an iPhone is a complicated process given Apple has strict security protocols in place. But you can easily jailbreak an iOS device for life using Checkra1n on your Windows PC. I hope the jailbreak process worked smoothly for you.
With prior jailbreak or not, you can always rely on Wootechy iSalvor to remove the activation lock without jailbreaking.